
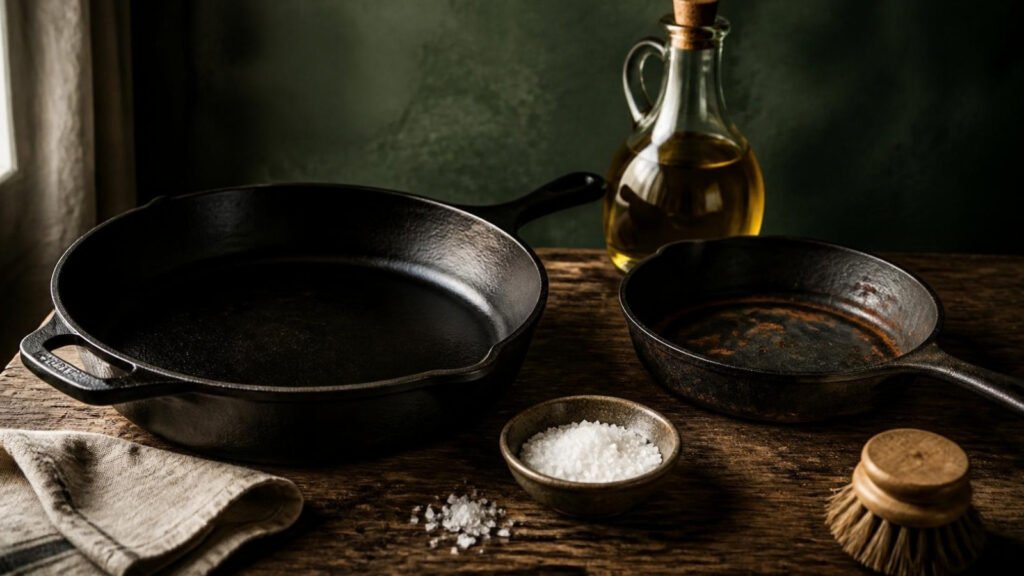
It was sitting under a folding table at an estate sale in mid-Missouri, a ten-inch skillet with an orange crust of rust across the cooking surface and a price tag of a few dollars. Two people picked it up, frowned, and set it back down. I took it home in a paper bag.
An hour of steel wool and one evening in a hot oven later, it was black again. It’s the pan I reach for most this fall, and it’s the reason I stopped thinking of cast iron as fussy.
Here’s why it matters for a lower-waste kitchen. Coated nonstick pans are built to be replaced. In its frying pan guide, Consumer Reports notes that GreenPan, a ceramic nonstick maker, says its pans can be expected to last two to five years, and a separate CR care guide says a nonstick pan with chips or scratches should be thrown away. The same frying pan guide says cast-iron pans “can last a lifetime.” Learning how to season cast iron, and how to bring a rusty one back, is the skill that turns a pan from a consumable into something you keep.
Some links in this post are affiliate links. As an Amazon Associate I earn from qualifying purchases, at no extra cost to you.
What Seasoning Actually Is
Seasoning is not a product or a coating someone sprays on at a factory and forgets. It’s cooking oil that has been baked onto bare iron until it bonds into a hard, dark layer. Lodge describes its factory finish as “100% natural”: a thin layer of vegetable oil baked on at high temperature, with the black color coming from a carbon deposit. Every time you cook with fat or wipe on a little oil after washing, you add to that layer.
That’s the whole trick. Seasoning gives the pan its release (Consumer Reports puts it simply: “Seasoning gives the pan nonstick properties”), and it protects the iron underneath from water and air, which is what causes rust. When seasoning wears thin, you rebuild it. When rust shows up, you remove it and rebuild. Nothing about the pan itself is used up.
A rusty cast iron pan isn’t ruined. It’s a pan whose seasoning wore off, and seasoning is the one part you can always put back.
What breaks seasoning down? Lodge’s myth-busting page says small amounts of acidic foods are fine, but “large amounts of very acidic or alkaline foods can break down the seasoning when cooked for extended periods of time.” Consumer Reports gives the same warning with a specific example, a vinegar-heavy barbecue sauce. Soaking and the dishwasher do the rest. Lodge says plainly that “soaking cast iron in water is a recipe for rust” and that a dishwasher will strip the seasoning.
Where I’ll Be Honest With You
Cast iron gets oversold online, so here is what the evidence does and does not support.
- “Lasts a lifetime” is a claim about durability, not a guarantee. Consumer Reports and NC State Extension both use the phrase, but neither backs it with a lifespan study. Lodge itself says cast iron is durable but “not indestructible,” and that it “will break before it bends.” Drop one on tile and it can crack.
- The iron-in-your-food benefit is real but variable. A 1986 study in the Journal of the American Dietetic Association (Brittin and Nossaman) tested twenty foods and found most contained significantly more iron when cooked in iron utensils. It also found the amount depended on the food’s acidity, moisture, and cooking time. That makes cast iron a small, inconsistent source, not a supplement. If your doctor has told you to limit iron, ask them before you switch everything over.
- The soap rule depends on who you ask. Mississippi State University Extension and an NC State Extension writer both say to skip soap because it strips seasoning. Lodge says the opposite: modern dish soap is “no longer strong enough to remove seasoning from cast iron,” and a little is fine for routine washing. I side with the manufacturer here and use a drop of mild soap when a pan is greasy.
- The “right” oven temperature varies too. MSU Extension seasons at 350°F for an hour and repeats three or four times. NC State’s guidance uses 500°F. Lodge says 450 to 500°F for one hour. They all work. Lower temperatures tend to need more rounds.
- It’s heavy. Consumer Reports notes the heaviest skillet in its ratings weighs more than 9 pounds. If lifting that with one hand is hard on your wrists, a smaller skillet or a lighter material may suit you better.
None of this is a reason to avoid cast iron. It’s a reason to treat it as a sturdy tool with simple maintenance, not a miracle pan.
How to Season and Restore Cast Iron, Ranked From Easiest Fix to Biggest Job
Start at the top and only move down the list if the easier fix doesn’t work. Most pans never need anything past step 2.
1. The Everyday Wash, Dry and Oil
This is maintenance, and it prevents almost every problem below. Lodge’s routine is three steps: wash with warm water (soap is optional) using a stiff-bristled brush, dry it completely, then rub a thin coat of oil over the whole surface with a paper towel. For stuck-on food, Lodge recommends a pan scraper and warm water. I set the pan on a low burner for a minute after towel-drying, because any water left in the pores is where rust starts.
Best for: Every pan, after every use. It takes about two minutes and keeps the seasoning building instead of wearing away.
2. The Salt Scrub for Light Rust and Sticky Spots
If you find a few orange freckles or a gummy patch, try the gentlest abrasive first. Mississippi State University Extension suggests a wet towel and kosher salt as the first step for rust, and NC State Extension recommends scrubbing light rust with a salt-dampened cloth. Coarse salt scours without cutting into healthy seasoning around the spot. Rinse, dry on the burner, and oil.
Best for: A pan that sat damp overnight, small rust spots on the rim, or a sticky film from too much oil. Try this before anything harsher.
3. The Full Oven Re-Season
This is the core of how to season cast iron, and it’s the step that brings a dull or patchy pan back to black. I follow Lodge’s method:
- Wash the pan in warm, soapy water and dry it completely.
- Rub a thin coat of oil over every surface, inside and out, including the handle. Lodge’s test kitchen likes vegetable oil, melted shortening, or canola oil. “Go easy on the oil,” their page says. Wipe it until the pan looks almost dry, because the oil shouldn’t drip or run when you tilt it.
- Preheat the oven to 450 to 500°F and lay a sheet of foil on the bottom rack to catch drips.
- Set the pan upside down on the center rack, so oil can’t pool on the cooking surface.
- Bake for one hour, then turn the oven off and let the pan cool inside.
Expect some smoke, so turn on the hood or crack a window, as NC State’s guidance recommends. If the finish comes out sticky, that means the oil coat was too thick. Lodge’s fix is another hour in the oven. One round is enough for maintenance. A stripped pan looks better after two or three.
Best for: Dull, gray, or patchy pans, any pan you just de-rusted, and thrift-store finds of unknown history once they’re clean.
4. Steel Wool or a Short Vinegar Soak for Heavy Rust
This is the estate-sale rescue. Lodge’s restoration guide says to scour rusty sections with steel wool or the Lodge Rust Eraser, wash, dry thoroughly, and then do the full oven re-season above. Steel wool is only for rust removal. Lodge doesn’t recommend it for daily cleaning, since it takes good seasoning off along with the bad.
For rust that won’t budge, both extension services describe a vinegar soak, but with a strict time limit. MSU Extension says to soak no more than 15 minutes at a time and check whether the rust flakes off. NC State uses equal parts white vinegar and water, checks every 15 minutes, and warns that leaving the pan in too long “can damage the metal.” Rinse it well, dry it right away, and re-season the same day, because bare iron rusts fast.
Best for: Pans with rust across the cooking surface, inherited pans that sat in a barn or basement, and the estate-sale skillet nobody else wanted.
Skip entirely: The dishwasher, an overnight soak in the sink, leaving a pan in vinegar for hours “to be sure,” and a thick coat of oil before baking. Each one creates the exact problem you’re trying to fix: rust, pitting, or a sticky finish.
The Cost Math
This is an illustrative estimate built on a stated assumption, not a measured figure. Say a ceramic nonstick skillet costs you $40. If it lasts two to five years, the range GreenPan gives Consumer Reports, then over twenty years of cooking you’d buy somewhere between four and ten of them. That’s $160 to $400 in replacement pans, and four to ten worn-out pans headed for the trash.
A secondhand cast iron skillet costs whatever the estate sale or thrift store is asking, plus a few dollars of steel wool and the oil you already own. A new Lodge 10.25-inch skillet is a one-time purchase too. The ongoing cost of seasoning is an hour of oven time now and then. The bigger savings is in the landfill. EPA estimated that about 2.2 million tons of small appliances were generated in 2018, and 75.9 percent of them were landfilled. Cookware isn’t broken out separately in that data, but the pattern is the same: things built to be replaced end up in the ground.
Your 3-Step Fix
- Check the pan you already have, or find one secondhand. Rust is fine. Cracks and warping that keep the pan from sitting flat are not.
- Match the fix to the problem. Salt for light spots, steel wool or a short vinegar soak for heavy rust, then one hour upside down at 450 to 500°F with a very thin coat of oil.
- Wash, dry and oil after every use. Dry it on a low burner, wipe on a thin film of oil, and never leave it soaking. That habit is what keeps you from ever needing step 2 again.
Frequently Asked Questions
How do I season cast iron in the oven?
Wash and fully dry the pan, rub a very thin coat of high-smoke-point oil over every surface, and bake it upside down on the center rack at 450 to 500°F for one hour with foil on the rack below. Turn off the oven and let it cool inside. That’s Lodge’s method. MSU Extension uses 350°F and repeats three or four times, which also works.
What oil is best for seasoning cast iron?
Lodge recommends an oil with a high smoke point and says its test kitchen likes vegetable oil, melted shortening, or canola oil. You don’t need a specialty oil. How thin you spread it matters more than which oil you use.
Can I use soap on cast iron?
Lodge says yes. Its cleaning guide says modern dish soap isn’t strong enough to remove seasoning, and lists soap as part of routine washing. Some extension services still advise skipping it. If you use soap, keep it mild and brief, and always dry and oil the pan afterward.
Is a rusty cast iron pan safe to restore?
Lodge calls “rusted cast iron is ruined” a myth: scrub the rust off with steel wool and re-season. Pans with cracks or a warped base that rocks on the burner are a different story, and they’re better retired.
Can I cook tomato sauce in cast iron?
Briefly, yes. Lodge says small amounts of acidic food are fine, but large amounts of very acidic food cooked for a long time can break down the seasoning. For a long-simmered marinara, I use a stainless or enameled pot and save the skillet for searing and roasting.
Keep Reading
- A Guide to PFAS-Free Pots and Pans
- Wood Cutting Board vs Plastic: Why We Finally Made the Switch
- The Grill Accessories Quietly Ruining Your Clean Cookout
What’s the oldest or ugliest cast iron pan you’ve brought back to life, and where did you find it? Tell me what it looked like before and what finally got the rust off.
Want more clean kitchen content like this? Join the MZWK community — practical, no-BS guides for a healthier, lower-waste kitchen without the guilt trip.
Written by Dan Duda
Dan builds software for a living and spends the rest of his time rethinking how his kitchen cooks, stores and shops. He started My Zero Waste Kitchen to share the sourced, practical swaps he actually uses, and to keep plastics and harsh chemicals out of the food he makes. More about Dan
Free printable: get the 7-Day Kitchen Reset Kit, a daily checklist, a week-long waste audit, fridge labels and a use-it-up planner, plus a new guide every Sunday.
Discover more from My Zero Waste Kitchen
Subscribe to get the latest posts sent to your email.